


This article on how to use an ice axe was first published in 2016.
Your ice axe is a key tool in effective and efficient movement. It gives stability and security with a range of techniques in skilled and practised hands. Let’s take a further look at how to use an ice axe to keep you confident and safe.
A good piece of advice commonly given is: “In descent always approach an unknown slope with your axe in hand.” In the UK, the favoured default position in use as a movement aid is to hold the axe by the head, in the uphill hand, with the pick facing back.
Traverses and diagonal ascent/descent
In steeper terrain, on harder slopes and windier conditions, move in a tripod fashion from a stable position to a stable position. Look for rhythm: ie. axe, step, step; axe, step, step or axe, kick, kick; axe kick, kick.
Direct ascent
As in traverses, there are a variety of holding options depending on terrain demands.
Descent facing in
Descent facing out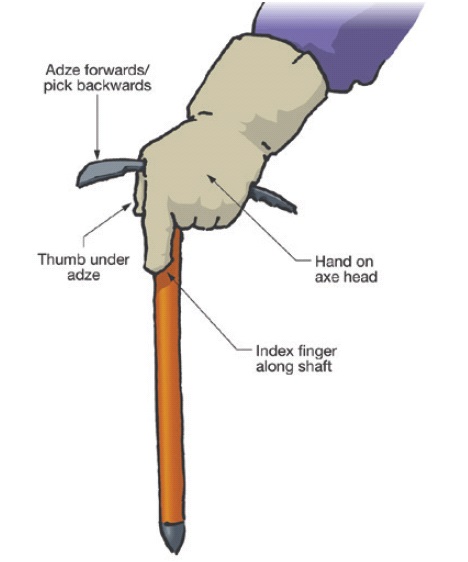
Horizontal traversing
With the speed and ease of attachment of modern crampons this is an art that is practiced less and less. But what if you or someone in your party have forgotten those crampons, have had one fall off down a slope, broken them, made a poor judgment call and end up on a firm patch of snow or are faced with a short patch of hard snow?
All steps should be horizontal/perpendicular to the fall line (the direct line down the hill). When slashing, if it is taking more than two or three slashes to cut a step, you will probably be better off with crampons on if you have them. When chopping, always chop progressively away from the first chop. You should only need 3-4. It’s worth considering putting on the axe leash.
Slash steps in diagonal ascent
Chopping steps – traversing
Slash in descent
Practice all the techniques described in this section, get some more coaching in movement and make the right decisions and hopefully you will never need to self-arrest. It is better to spend time on good movement than it is self-arresting. Remain tuned in to the environment.
Things that have caused trips and slips include:
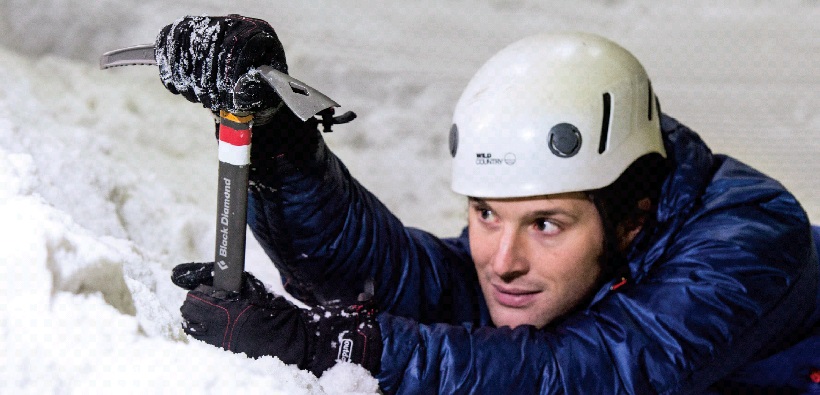
The technique of a basic self-belay is generally well understood. In a slip, trip or gust of wind, one could fall in any direction; the bottom line is: do your best to avoid it becoming a slide.
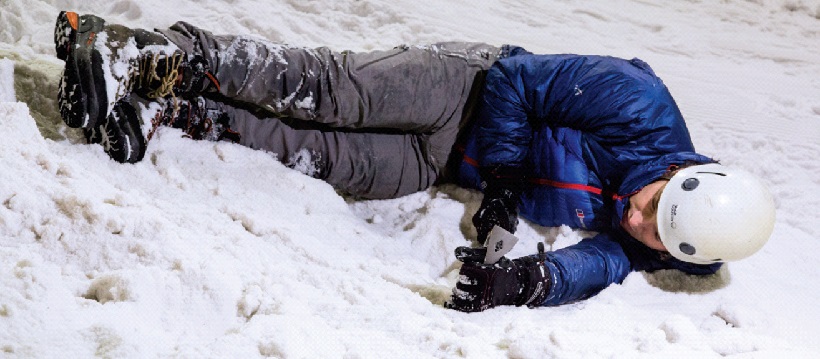
If you trip or get blown over, do anything you can to stop immediately, simply get any part of the axe in the snow and hold on tight, trying to get both hands holding on (see photograph above).
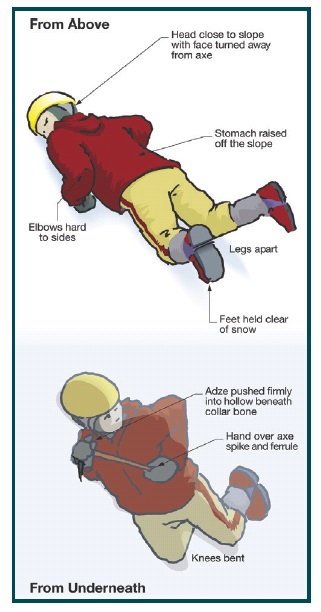 When practising arrests, make it reasonably realistic and consider wearing your rucksack. Choose a safe slope area with a safe run-out to fl at ground, and watch out for shallow/hidden rocks. Don’t practise on bullet-hard névé! Ideally, put on old waterproofs. Then remove your crampons and put on a helmet. Once you come to a stop, it is important to kick your feet into the slope before you stand up. The basic braking position is feet first on your front (see illustration, right). All the other techniques should get you into this position. The pressure of your bodyweight on the axe head keeps the pick in the snow, and it is this that provides the brake.
[1] Feet first on front
[2] Feet first on back
With the next two, there is an off stage where the axe head needs to be dragged/brought back under control at the shoulder. This needs to be done quickly then pressure reapplied.
[3] Head first on front
[4] Head first on back
[5] Tumbling fall
When you’re practising, it’s better to log-roll your way into this one.
Like most practical outdoor skills, ice axe and crampon technique is always best learned in a practical environment. Based in the Cairngorms National Park, Glenmore Lodge National Outdoor Training Centre offers fantastic training in winter skills at all levels. Find out more and book your course by calling 01479 861 256 or visit: glenmorelodge.org.uk
